Conversations Around Writing

I recently wrote a blog post for CORE Education around conversations I had had recently about writing. I even drew the image!

“I have had a number of conversations recently with teachers about the role of digital technologies in the teaching of writing. I spend a lot of my professional learning delivery around the teaching of writing with a focus on Māori and Pasifika boys through Spirals of Inquiry — looking at making changes in teacher practice to engage and enhance learning experiences for their learners.”

Read the whole post on the CORE Blog.

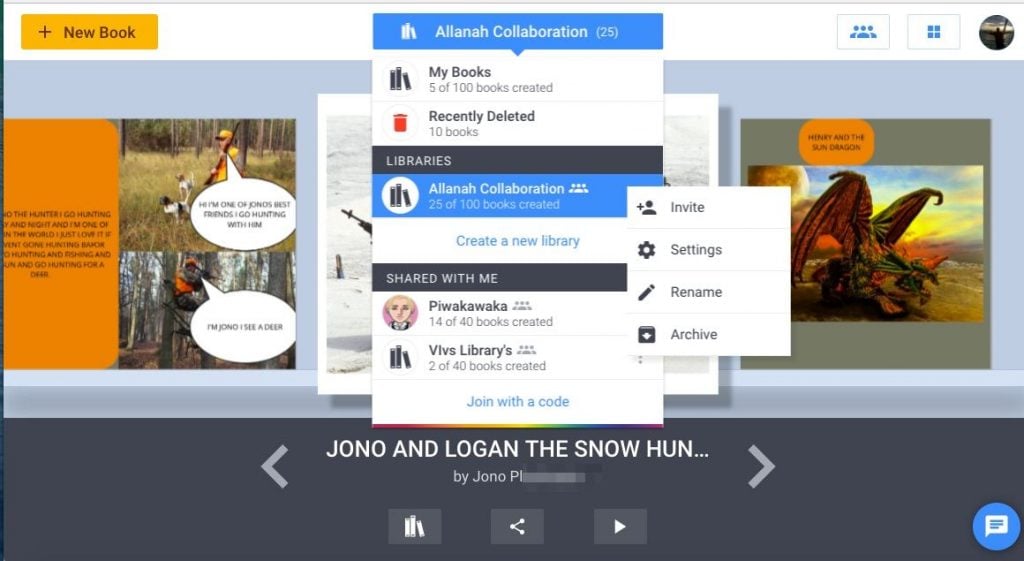
Book Creator for Chrome

I have been meaning to post about Book Creator for Chrome for a while now and make a couple of ‘how to’ videos but Book Creator themselves have beaten me to it which is a good thing.

Book Creator for Chrome is available on any device as long as it has the Chrome web browser installed.

The first 7min video reprises how to use Book Creator for Chrome as a teacher after making a teacher account. Being in Chrome it is nice how you can search for on line images as well as use your own to illustrate your book and with one click publishing it is very easy to work with.

Importantly at the moment when learners go to register as a student it asks for them to register with their Google Account. I queried this and was told that other options are in the pipeline.

Joining as a student is really handy because then they can then join the teacher’s library automatically via an invite code and their names automatically aligned with their books for easy recognition, feedback and possible publication on line.

The teacher makes a library for collaboration by adding a library and then clicking on the three dots on the right hand side of the shared library.

This then generates an invite code that is shared with students so they can join to teachers library. This needs to be ready for students as they sign up

This second video is how to import books from your Google Drive or iPad into Book Creator for Chrome so they can be further worked on and edited before publication.

Publishing books via the iPad app and Chrome is easy- I would love to see and share what you have created.

Please link in the comments when you publish a book so we can see what others have created.

Book Creator to Seesaw Workflow

Lots of schools I have been learning with have started using Seesaw as a means of sharing what has been happening in their classrooms with whānau. As you know I am a big fan of Book Creator and the two go really well together with the Book Creator export as a video function.

To help cement this workflow I have made this short video to show you how the two great apps can work so well together.


Life is Not a Race to be First Finished

I never realised when I started this blogging thing 2007 where it would lead. I called it Life is Not a Race to be First Finished cos kids in my class always seemed to be in a rush to be first wherever they went and it annoyed me. It went against my philosophy of ‘together we will get there bringing everyone with us’.

On this day, 31 January, in 2016 the title of this blog came into perspective and my life changed. Life was not indeed a race to be first finished.

I was working in Blenheim that day and saw that I had had four missed calls from a hidden caller ID. Alarm bells rang when eventually they got through. It was Nelson Anniversary Monday and they had rung me and asked for an urgent call back from my regular mammogram.

I cried in the car all the way home as fear set in. I had to pull over a couple of times as it got too much to bare. My sister had passed away from breast cancer sixteen years ago and her journey is always with me. It couldn’t be happening again could it???

What followed was further mammograms, MRI, biopsies, scans and specialist visits. There was talk of a double mastectomy and poisoned lymph nodes and long words that had little meaning. I tried to be strong but there was lots of tears especially telling the ones that I love most.

I had the mastectomy on March 16 followed by six cycles of aggressive chemotherapy here in Nelson, and then five weeks of daily radiation in Christchurch. My family and friends both in Nelson and scattered about New Zealand and the world helped me get to where I am now and I am indebted to them- their support, their love and sometimes just silence as I cried with pain and fear at what was happening to me.

Through all this there are a number of things that I am most grateful for…

  • my family, in particular Danny and Amy, who left their work and lives and came to be with me when I needed them most
  • my Nelson friends who came to visit with companionship, food and lawn mowing!
  • my scattered kiwi friends who supported me with moral support and driving when I needed it
  • my work friends who kept an eye on me from afar and gave me the support I needed.

I am thankful for…

  • not living in Syria and being displaced. I have my own place to live in that I know is safe
  • Nelson surgeons, oncology doctors and nurses- who can help me find laughter when sometimes it is burrowed deep
  • being able to work virtually with schools so I still got paid when I was having radiation in Christchurch
  • access to Daffodil House in Christchurch- I stayed there for free for the five weeks- it is wonderful- your donations are being well spent and are much needed
  • access to modern medicines- I am still on Herceptin- which costs quizillion dollars but is government funded
  • still being alive one year later- there were times that that wasn’t guaranteed and I was scared.

365 days later and things are OK. I have had a bone scan and MRI and they can’t see any more tumours. I am having some trouble in believing that I might have survived it and I suppose only time will tell but in the meantime….

‘My best medicine is to try and live without fear, have fun, live a balanced life, have check ups and just get on with it.’

My big message is have regular mammograms as without it it never would have been picked up- even the breast surgeon couldn’t feel a lump and it was 5cm big. And try and get what you need and enjoy every single day as you don’t know when it might all disintegrate. Life is not a race to be first finished.

My Social Book

I feel that the time is right for me to join once more sharing on line. 2016 was a bit of a blur with a diagnosis of breast cancer, mastectomy, chemotherapy, radiation and working full time as a Learning with Digital technologies facilitator supporting schools from the Marlborough Sounds to the bottom of the West Coast. I put my energies into staying alive and getting the job done and there wasn’t a lot of room left over for anything else.

Throughout much of that time I used a daily photo blog cross posting to Facebook to keep my friends up with where I was and how I was. It proved to be really useful in keeping many of the people who care about me in the loop as to what was happening.

At the end of the year I saw an advertisement on Facebook for My Social Book– an old school version of your Facebook postings. I thought it would be a useful record of the year’s journey and as a useful example for schools who have a Facebook page to quickly put together a yearbook of their school’s happenings.

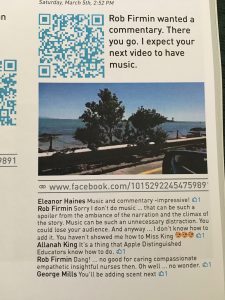
The book arrived yesterday and I was very pleased with it. All of the cross-posted and shared photos and comments were there. Cleverly the videos were captured with a title frame and a QR code to take you to the actual video if you scanned the QR code- a very cool blend of analogue and digital.

I have uploaded some photos of the book to give you an idea of what it looks like.


Presentation Tools

I was asked recently what presentation tools can I recommend. We have moved away for felt tip pens posters thank goodness. Children would spend a lifetime colouring in borders and copying writing fonts from books.

I wanted tools that are easy to put on line in one step- that is apps or sites that give you an easy embed code without having to upload it to a third party site.

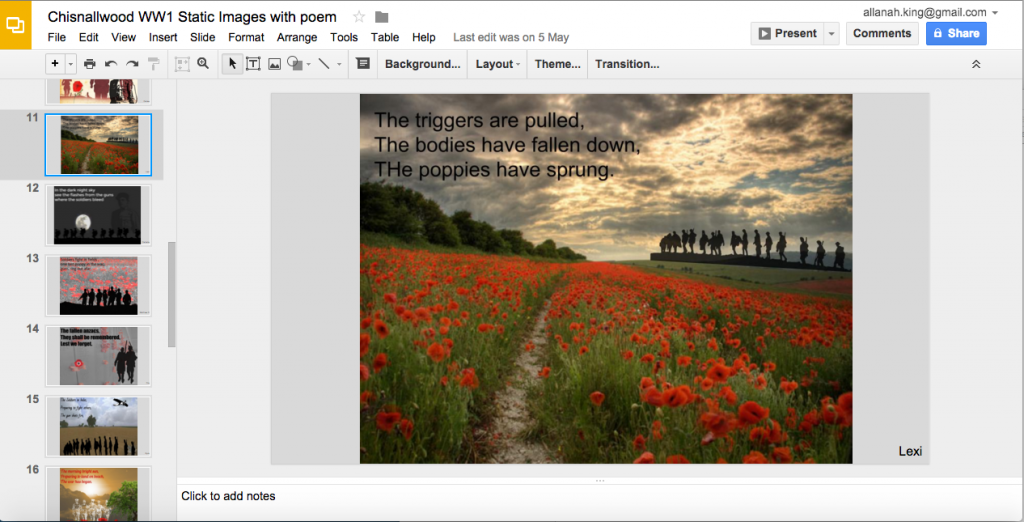
My first thought was of using Google Slides. Kathy Baker from Chisnallwood Intermediate used Google Slides with her students to make these static images and poems.

Screen Shot 2015-10-25 at 2.41.50 pm


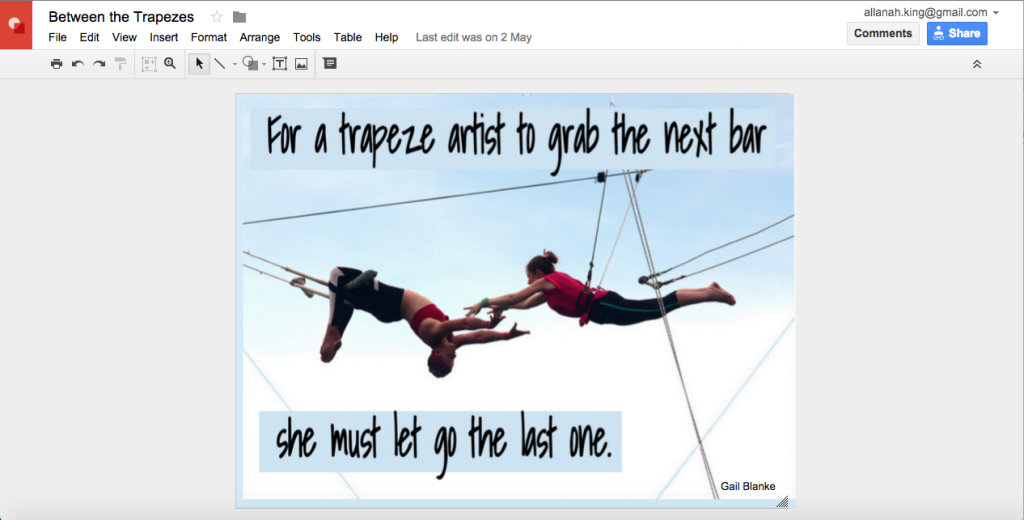
You could also use Google Drawings in a similar way.

Screen Shot 2015-10-25 at 2.48.30 pm

I thought also of Haiku Deck, Canva on an iPad and Prezi on my laptop.

Canva and Haiku Deck are nice and simple but you only get an image or a PDF to download then you have to do something else with it to out it on line. I have never been a fan of Prezi because it took me a long time to work it out. It does however give you an easy to embed embed code like with this Prezi on using Twitter by Ray Burkhill.


But over the week I was looking at a rather slick resource which was Adobe Slate made on an iPad. I used my Adobe account to sign up and very easily put this together on the iPad as an example. Once put together you can easily share it via a link in an email or via the embed code.

Click on the image below or this link to see the cool presentation on all its glory!

The things that I do

And now you can make Adobe Slate designs on line as well. https://slate.adobe.com/

What other presentation tools would you recommend?

Book Creator Ambassador

Book Creator is my most highly recommended iPad app for all kinds of reasons.

Firstly is its flexibility. I find it being used with pre-schoolers right through to senior students.

  • I see grandparents making social stories for their grandchildren and recording their own and the children’s voices.
  • I see junior school students using Book Creator to record and explain their thinking around all kinds of curriculum thinking areas.
  • I see more senior students planning, writing, illustrating and hyperlinking  their learning using the app.
  • I love the way that users can collaboratively author their books using the app and books started on different iPads can be easily brought together into one combined book for publication. We use Flick or Google Drive to bring the larger projects together in this way.

I see Book Creator being used across the curriculum in all sorts of ways.

  • Using the free hand drawing feature to explain maths strategies.
  • Using the camera tool to add illustrations from children’s own art work.
  • Using the add photos tool to add pre-recorded video self reflections on work or progress.
  • Using the add text feature for written language and hyperlinking to web resources.
  • To pull together an ePortfolio of learning throughout the term.

I really enjoy the intuitive ease of use of Book Creator. I love apps that don’t really need to be ‘taught’. If you want to add a new element you tap the + button. If you want to personalise an element select it and tap the i to get more info about what you might do with it. Easy as.

Book Creator is available across platforms as well so it works equally as well on an Android device.

When completing the books I also appreciate the myriad of ways they can be exported from the iPad as finished pieces.

Simplest would be to export to iBooks. This is a great option for those who want to read and re-read their books.

You can export the book as a video. This is a lovely way to bring the book alive. All of the audio and recorded video will play inside the exported video.iBook

You can export the book as an ePub. This way your book will be able to be read on any laptop with ePub reader app like Readium Chrome Web App, Mac iBooks or Calibre on a Windows Device.

You can also export your book as an ordinary PDF for printing for classroom wall display or to send via snail mail to our non digital whānau.

Book Creator has recently introduced their Book Creator Ambassador Programme to recognise and champion the uses of Book Creator in classrooms.

Book Creator Ambassador badge

I am proud to say that they asked me to join the programme. I can now add Book Creator to my Digital Badging Portfolio.

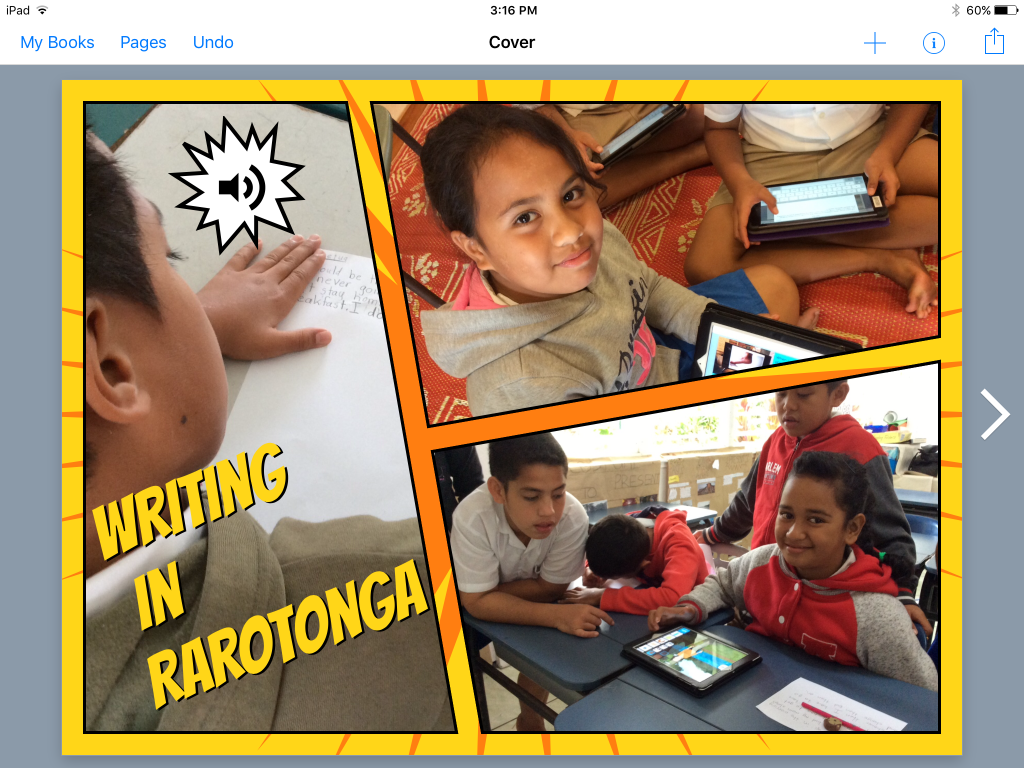
And now with the update you can excite and engage your learners with comic like books.

Book Creator Rarotonga

How do you use Book Creator with your learners?

Storybird- a change of mindset

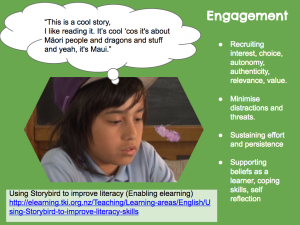
I recently was preparing a workshop for teachers around Universal Design for Learning and student engagement and was doing some research. An article on TKI mentioned Storybird as a vehicle to engage reluctant learners in writing.

Screen Shot 2015-08-17 at 8.51.05 pm


I never like to recommend something without giving it a trial for myself. Fortunately I teach at a local school as well as being a LwDT Facilitator so had some willing learners to help me trial the tool.

I registered myself with a Storybird account and to keep things simple I manually entered the students names into Storybird and then set about changing the passwords that Storybird had assigned students and aligned them with the students’ Google Accounts.

This took a bit of time but paid off with fewer students having to be reminded of what their passwords were.

All of the writing activities we try need to be accessible on a variety of devices as I have Chromebooks, Mac Books and iPads to use and not enough of each to be exclusive. Storybird works well on all of these devices. To access the Storybird website on the iPad I made it into a shortcut on the home screen and on the laptops it was linked from our Moturoa blog.

Once all that was set up I made a practice picture book myself so that I would be one step ahead when we used it in class. In introducing the concept to my boys we said we will trial it for a few weeks and they can give their verdict on it.

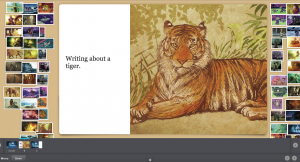
We cracked into it. On first reflection I was underwhelmed. The idea is that you get a selection of images to use, select one and then use the images produced by that particular artist. You can search for images from a topic to get you started but my boys wanted to write of motorbikes and rugby and there were no images related to those sorts of topics to choose from. You cannot pick and mix the artist. Once you select one artist you can only use other images that that person has created.

Screen Shot 2015-08-17 at 9.12.36 pm

We pushed on as it was a trial. Although the illustrations were stunning some of the boys were reluctant to pick anything as none appealed. In the end they picked something and used that although it wasn’t a choice that initially engaged them. Few of the images lent themselves easily to building a narrative sequence so some of the boys just wrote  captions for the random images that engaged them.

Some however really engaged with the Storybird concept and managed to relate the images together to do quite a good semblance of a narrative.

After the writing and editing was done the boys pushed SAVE and PUBLISH and I was able to easily publish it with the provided embed code.


To spice things up a bit we also had a competition with voting via the blog to decide which stories we like best.

Please add your vote to the blog side bar to encourage the boys in their writing.

Our verdict

  • Stunning illustrations
  • Easy to use
  • Easy to embed
  • Intuitive interface
  • Works well across all devices
  • Limited mix of images- you have to use one artists’ images and cannot pick and mix
  • Limited range of images related to some of the things the boys wanted to write about
  • Once engaged some boys really involved with the process and showed an interest in working on it at home.
  • You can invite others to work on the stories collaboratively but we never really went down that track.
  • The teacher can leave notes on children’s writing as feedback on the process
  • You can read and reflect on other people’s writing by leaving comments which can be moderated.

As a final reflection I was thrilled when a parent joined in and made another book at home with her child and invited me to collaborate on it with her and she left a comment on the blog post.


Wonderful work and writing. This has opened up a whole new world of e-learning to me and I’m loving it I’ll be back for more!


Influencing Inclusive Practice

I feel a little like an alcoholic at an AA meeting.

“Kia ora, my name is Allanah. I am a blogger and it has been six months since my last blog post.”

Life gets busy and I don’t write unless I have something to say. Sonya van Schaijik posted a link to some blogs that she is linking to which alerted me to my indiscretion so I cross post this from the CORE Education blog.

Inclusive designPhoto: © Copyright wfmillar & licensed for reuse under this Creative Commons Licence.

Introducing Universal Design for Learning (UDL) to colleagues and supporting its use in our inclusive practice is a big part of my work at CORE. Recently Allanah King and I had an hour or two in transit together. Allanah is a Learning with Digital Technologies facilitator, classroom teacher and a passionate advocate of the difference technologies can make in learning. We got talking about how UDL is continuing to influence the way she works. Here’s an edited Q and A of our discussion.

Chrissie: So Allanah, how is UDL is influencing the way you think about planning learning?

Allanah: I think it has made me much more aware of things I do that might get in the way of other people’s learning. So for example it makes me think about barriers hidden in the way I teach or facilitate, or barriers in the resources I use or the way I organise the learning environment. At the same time, it is also helps me create much more user-friendly environments. I know now that there are things I can do from the outset to make learning experiences more effective for more people. A key thing is that I can build in support or different ways to access material or instructions at the beginning, rather than add it in later. And I can offer that support to everyone so that can use it if they need it.

Chrissie: That’s cool. I think that’s what I would call a “design to include” mindset. It’s like we know there is always going to be diversity. That’s a given. Someone in the room is always going to have dyslexia or will have forgotten their glasses, or easily loses attention if someone talks for long. Plus everyone will be bringing different experiences and histories. When we don’t have that design to include mindset, we can inadvertently design to exclude. We don’t mean to, we do it unconsciously.

Allanah: Yep, when I was first full-time teaching in a classroom of primary-school-aged children, I had never heard of Universal Design. I was teaching from the perspective of doing what I thought was best for all my students. I taught from a position from where I thought most children would succeed. Once everyone was occupied doing something, I would try and ‘pick off’ the outliers or groups of children who historically had been struggling to give them more support.

As I became a more experienced teacher, I tried to see the lessons from more of a child’s perspective. I started structuring lessons around the individual needs of learners and at the same time wanted to create an environment that worked for everyone.

As I learn more about Universal Design, I design lesson sequences in a way that supports all learners right from the beginning, rather than as an add-on. That’s quite a big difference.

Chrissie: That makes a lot of sense to avoid the retrofitting. Have you got any examples?

Allanah: At one point I had a student called Anna in my class. As Anna had low vision, I made sure that when I wrote instructions for everyone on the whiteboard I read them aloud so Anna could hear them. I also gave Anna her own copy in large print to take to her desk. I made sure when we played sport we used large bright coloured balls so Anna could more easily see the ball. When we worked with text in Google Docs, I increased the default font size of our Google Docs (video tutorial) so we could all see the text more readily as we typed. In my planning across the curriculum, I tried to make things work for Anna and, in doing so, ensured that all learners in the class benefitted. My teaching was enhanced, and all students could participate and were able to access the content independently.

Chrissie: That’s a great example of a UDL approach in action. For example, offering those instructions in different ways aligns with the principle of Representation. Not only did you provide Anna a range of options to support her understanding, you also offered them as a support for everyone. I can imagine in your classroom that students would also be encouraged to take photos using tablets to capture ideas for later or just to bring the information nearer to them. These approaches also support independence and provide students with opportunities to make good choices about what they need to support their learning.

The use of coloured balls was also a great approach. It’s such a small thing, but it can make such a massive difference to a student’s participation – it levels the playing field. The coloured balls could be considered an assistive technology, just like Google Docs – they both increase access. The beauty is that they can be used by everyone. This is really the Action and Expression principle in action. We recognise and minimise barriers to participation and create options and embedded supports for students so they can just get on with creating and learning and sharing.

Chrissie: So what about your work as a facilitator, how is UDL having an impact there?

Allanah: As a Blended eLearning Facilitator I facilitate a number of practical workshop sessions with teachers and endeavour to make sure my approach and resources are designed with Universal Design for Learning principles in mind. I try think of the sessions from the perspective of the participants. Whenever possible I send out a Google Form giving participants a taste of what to expect from the session and asking what they would like me to know about them. Here is anExample Google Form from a workshop from Chisnallwood Intermediate. I give people access to the resources beforehand so they know what’s coming. I make sure they have access to those same resources during and after the session so they can rewind bits if I went too fast, or if they missed part of the session, or were not able to attend at all.

I am also conscious that all participants will be at different stages of their elearning journey: some may be just beginning, others may be eLearning whizzes. So my strategy is to give participants a range of options during a session including an ‘escape lane’ where they can self direct their own learning or explore a line of inquiry that grabs their attention as I am working alongside others who wish to go at a more structured pace.

UDL has also really influenced my thinking when I am preparing resources for participants. Now I try to provide resources keeping in mind that people will have quite different preferences – some may prefer to watch videos, some may prefer to follow written instructions, some may prefer to have the resource on their iPad and some may prefer to be led directly as they walk through the material step by step. Others will use a combination of all the options. I also try to make resources that are rewindable and reviewable.

Chrissie: I can increasingly see how UDL is having a significant impact on how we facilitate and work alongside adults. So often workshops, staff meetings or professional learning sessions are scheduled in the late afternoon when teachers are exhausted and already “full up” with the day. Creating engaging, flexible, rewindable options makes so much sense. Designing to include seems to be an imperative in those contexts.

So that is a snapshot of our conversation. Huge thanks to Allanah for her openness and willingness to share her journey.

if you are interested in finding out more about Universal Design for Learning, visit:

Google Education Trainer

UPDATE: This process has changed with a name change and change of emphasis.

Here is some more info on the changes

In December 2014 I qualified to be a Google Education Trainer. This step is the latest on my journey to know more about Google products and how to support students and teachers in their use to support learning.

GoogleEducationTrainer_badge_RGB

There are essentially three kinds of Google certification that I have achieved, each quite different and I don’t think of them in any particular hierarchy- they are just different.

A Google Certified Teacher– To become GCT you apply and prepare an application video and written application to go to a Google Teacher Academy. Google select between five and ten New Zealand applicants for each Google Teacher Academy which accepts about 50 educators in each intake. Until this year were biennial so I hope they have moved to having one a year from now on. I applied to go to Sydney because it was closest, and therefore cheaper, for us here in NZ but you can apply to go to any GTA around the world. In 2013, when I became GCT, we had a guy from Alaska who was at the Academy! You have to pay your own way- flights and accommodation. It helps to get picked if you are active in leading the educational community- Twitter, Google Plus, that sort of thing- indeed questions about the number of followers you have is part of the application process. Many apply and few are chosen!

Google Educator – To become a Google Educator you take four compulsory exams (Gmail, Docs, Calendar and Sites) and one elective exam (Chrome, Chromebooks or Android devices).
You have to get over 80% on each exam to pass but if you fail one of the tests you have to wait for a time, seven days I think, to sit it again, pay the money again and have another go. You have to complete all five tests within a 90 day period. The content in the tests is easy sometimes and hard sometimes, depending on what you know. In total it would cost you about $100NZ.

When you have completed the exam it is automagically marked and you know instantly if you have passed or not. It annoyed me though that you don’t find out which questions you got wrong so you could potentially be giving people wrong advice when they ask the same questions as were asked in the exams because you only thought you got the answers right.

You could learn as much by reviewing the learning modules and not actually sitting the exams but it does give purpose and a feeling of accomplishment if you know there is going to be an exam at the end.

Google Education Trainer– To gain the Google Education Trainer certification you have to have previously achieved Google Educator status and submit a record of Google PD sessions you have delivered, references to say you did a good job of them and make a training video outlining an aspect of Google goodness. You also submit an in depth case study of a Google PLD session you have delivered. In my case I chose to submit my case study around using Google Classroom. If accepted you are then added to the database of global Education Trainers and you get to put the Google Trainer Badge on your blog or website. You also get access to a global support group of other GCT or GET to learn and share your resources- that is where the you find the gold- learning from and with other passionate educators.

You can find out more through this site https://www.google.com/edu/training/get-certified/

Writing Books for iTunes

We have had some successes with writing books using Book Creator and publishing them to iTunes.

I thought I would outline the process here because it really is simpler than you might think.

Here is our workflow for this particular lesson.

It was Guy Fawkes and children had stories to tell of their fireworks experiences that we wanted to record and share.

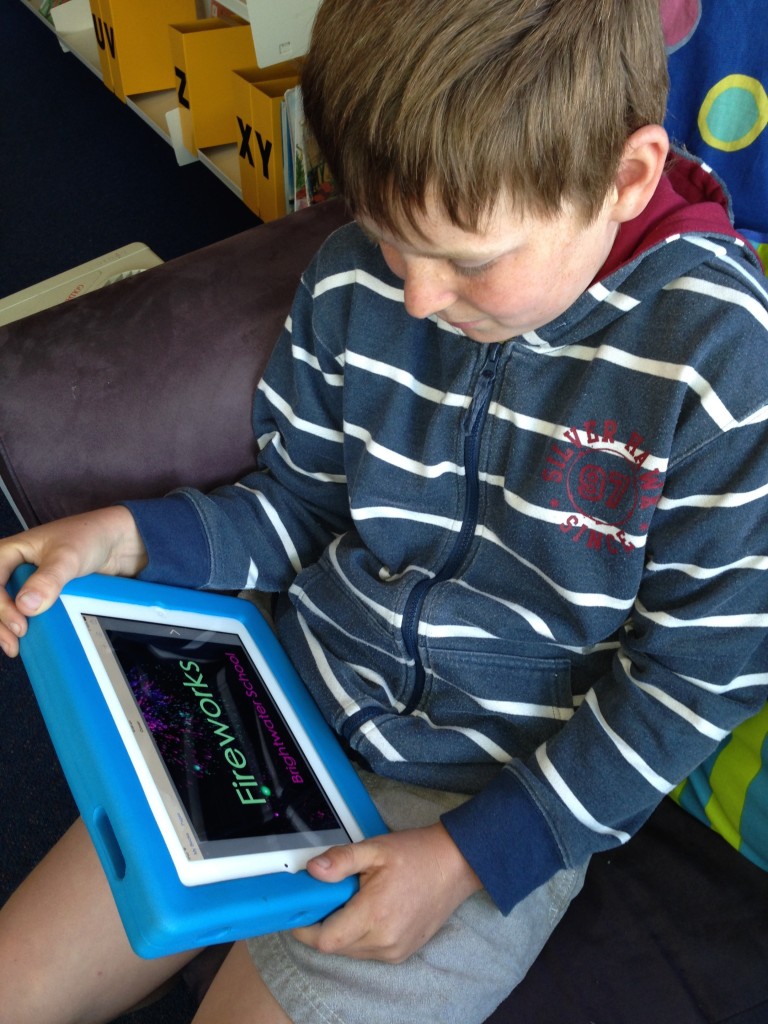
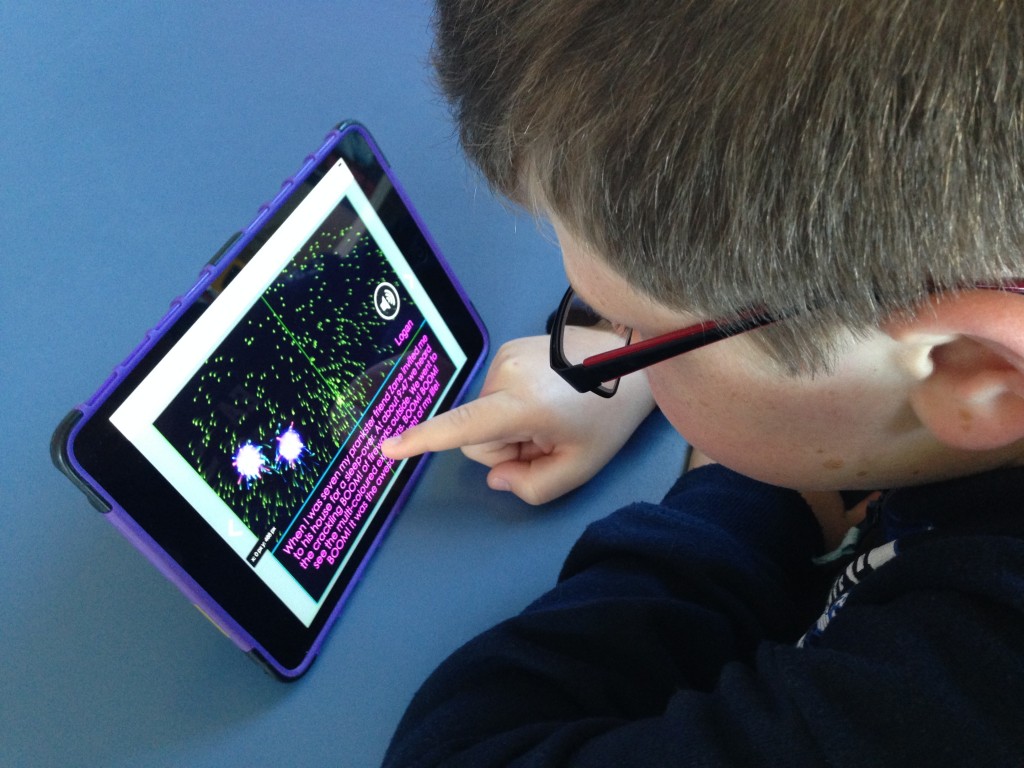
Firstly we had a play with the Real Fireworks App that I had bought but I see that there is a free version as well. The app very cleverly lets you take a screengrab of the fireworks in action as you create fire bursts. These were saved into the camera roll and Flicked to me or using Photo Transfer to move whole sets of photos to the one iPad in one go.

To collect the children’s writing in one place for this lesson I decided to use Google Forms. I had found a cool video of a drone flying through exploding fireworks so threw that in the form as well to keep things lively.

Here is a link to the actual form. Of course the children needed to have access to the form so I embedded and linked it into a blog post in the Moturoa Blog. The blog is bookmarked on all the devices they children have at their devices and added to the home screen of the iPads so everyone knows where to access everything we might need.

http://moturoa.blogspot.co.nz/2014/11/fireworks.html

The children were able to view the video independently and write their text in the form.

That night I had a bit of a play with copying the text from the form that I accessed via Google Drive/Google Sheets app on the iPad and pasted it onto the screengrabs that I had quickly out in Book Creator.

I matched the colours of the text with the colours of the Fireworks so it would all look lovely.

Next day I had the children record their narration of the text. To improve the quality of the recording I used my iRig Mike and my mike on the Apple ear buds, which worked quite well.

I wanted to have a little video in the book as a practice so used X-Mirage to reflect my iPad onto the Mac and record the fireworks using Quicktime. The video was small enough to email to my iPad but I could have uploaded it to Google Drive if I needed to to get it onto my iPad for inserting into the Book Creator. Boom! We were nearly ready to upload to iTunes.

I needed to do a couple more things before sending it off to iTunes. I needed to make sure the video was in mp4 format. To change it in Book Creator just select it and click on the ‘i’ and change the format!!

I also took a couple of screen grabs and made a copy of the book and took some pages out to act as a book sample for those who didn’t want to download the whole book.

I uploaded the whole project to Google Drive as it was too big to email to my laptop. Google Drive gave me a shareable link to the multi-touch book that I could then share with people directly via an email link or blog post to give them a copy of the book without sending it to iTunes.

STEP ONE: Create an iTunes Connect Account

I had already made a iTunes Connect Account to publish the Bling For Your Blog book so that part was simple. Book Creator has made a handy ‘how to’ on how to get started with an iTunes Connect Account. Here is the link to it. I think the process would be a lot more complicated if you wanted to sell your books but I decided that they were all going to be free!!!

STEP TWO: Install iTunes Producer

iTunes Producer is the software template that allows you to upload your books, previews and blurb. You connect the iTunes Connect Account with iTunes Producer. Book Creator again shares how to do this part.

STEP THREE: Upload Your Book

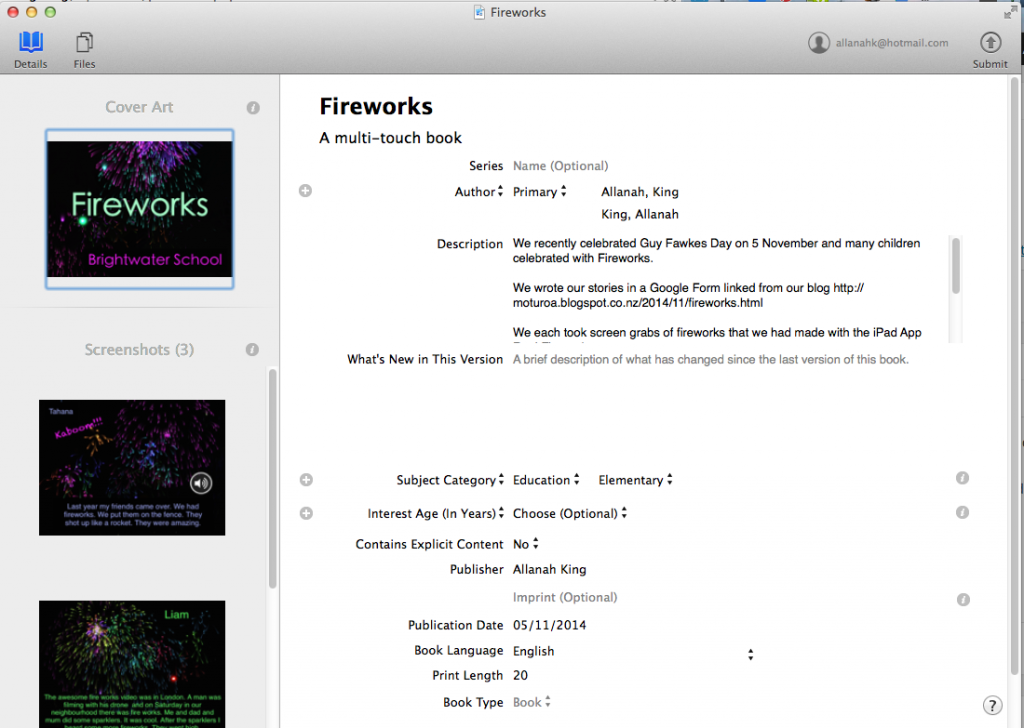
This is the easy part. You fill out all the information about the book for upload and if you get it wrong you will get error messages. This was the first time I had uploaded page previews and they had to be a specific size. I chose 748 x 1024 for the preview pages and 1023 x 1400 for the title page. Here are Book Creator’s notes on what to do for this part.

Screen Shot 2014-11-19 at 10.55.14 pm

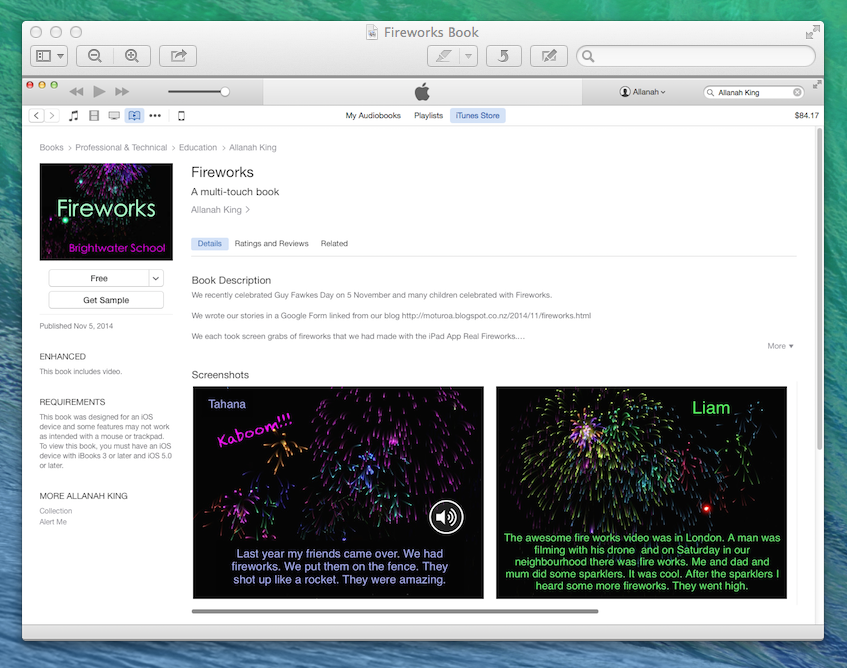
iTunes then takes a look at your book and makes sure it is suitable to be in the iBooks Store and a day or so later your book is available for the world to download.

Do take a look- We think it’s rather cool.

https://itunes.apple.com/nz/book/fireworks/id942796591?mt=11

Fireworks

If you didn’t want to go that extra step of publishing your book to iTunes you could easily export it to you Google Drive or Dropbox and get a shareable link from there. Here is the link to the direct download of the Fireworks book from my Google Drive.

IMG_6925

IMG_6920

And if you don’t like to have the book upload to iTunes or as a download From Google Drive you could always export it as a movie and upload it to You Tube as I did here.

Easy Accents – Macrons- Google Doc Add On

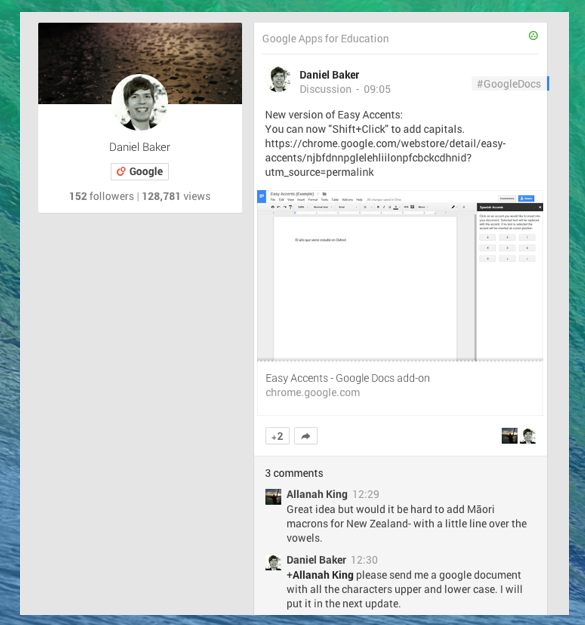
A couple of days ago Chris Harte, who was in my group at the Google Academy last year, posted on Google Plus about an Add On to Google Docs ‘Easy Accents‘ that allowed writers to easily use accents when writing.

As I often do I emailed myself the link so I could look at it more when I had a moment.

This afternoon I had a moment.

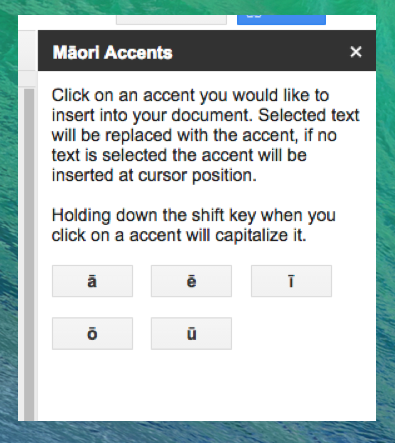
Dan Baker had originally posted that he had updated the app but sadly the accents didn’t include Māori macrons, only French, German and Spanish. I took it upon myself to ask Daniel if there was a possibility of adding Māori. Dan lives in Missouri and the time zones must be compatible with a Sunday afternoon in New Zealand so there followed a quick flurry of emails and a shared Google doc and within the hour the job was done and being pushed out to Google servers globally.

Screen Shot 2014-11-02 at 5.45.10 pm

So now go to a Google Doc- ADD ONS- get add ons and look for ‘Easy Accents’ or click here directly to add it to Chrome.

Screen Shot 2014-11-02 at 5.48.01 pm

I have not been able to contribute much to Connected Educator Month because of other work commitments but I think that this is what being connected is all about.

I am so impressed with Daniel’s responsiveness I donated to help him along and encourage young developers like him.

Embedding You Tube Videos from an iPad

A friend who had got herself into a bit of a loop recently wanted to know how to embed an Explain Everything exported video into a Blogger blog and only use an iPad. I have found that if you just use Safari you can get caught in a loop of using the You Tube App and you can’t get to the embed code as you would be able to do easily on a laptop.

To make the original test video I used Explain Everything.

You will also need to have Chrome installed on your iPad.

To record the tutorial I mirrored my iPad onto my laptop using Reflector App.

To make the finger taps visible  on the iPad I used Mouseposé. Mouseposé is a Mac App so I tapped the Mac screen with one hand while tapping the iPad screen with the other hand at the same time to make it look like I was opening apps etc on the iPad. Any other ways of achieving the same affect would be much appreciated.

I also added this as a resource to Bling for Your Blog to make it easy to find. Hope people find it useful.

After making this tutorial and sharing Deon Scanlon from Australia suggested an even simpler way of embedding a You Tube video into Blogger that didn’t even need an embed code. It’s funny isn’t it. You always do what you’ve always done. I had used Deon’s method for photos but hadn’t noticed it for videos.

Adding Keyboards in iOS 8

This is cross posted from my Boys Writing Blog

Over the holidays I updated my iPad to iOS8 which allows for users to install new keyboards from app developers. I have had Swype on my 3G Android Camera for some time and liked it. I wondered how it would go with kids. Some liked it and some didn’t. I think if you are very much a struggling writer then tapping each letter as you go would be a better option but for those who have some writing skills under their belt Swping would be worth persisting with to get the hang of it.

Play the video in full screen to see what T is saying and Swyping to see how it is supporting his writing.

T doesn’t know how to spell through and spelt it as thought but when he spells operation as operasion the app leads him to the correct spelling and gives him close choices should his Swping be less than accurate.

I also liked the way that he pauses to think of the word in chunks to better help him break down the writing process- the video helps make the learning visible.

I notice that T is also pushing the space bar for spaces between words. The app knows where the spaces are as he takes his finger off the screen so he doesn’t necessarily need to do that.

The other keyboard that I think that would be good to install as a choice with be Lower Case Keyboard by our very own Matt Thomas.

Matt has made the lower case keyboard with the Open Dyslexic font so as to better support learners who find differentiating letters tricky.

Just a note though that there is a bit of an iOS bug at the moment and you need to turn off guided access before you can install the new keyboards. I am sure it will be ironed out before too long.

ULearn14 Mobile Day: Dice Activity

This year at ULearn Mobile Day Barbara Reid and I shared our learning around ‘Transforming Learning with an iPad’. We wanted to make the event as engaging and useful as we can, modelling self directed learning and collaboration amongst participants.

One of the ideas we had was to lead participants in combining apps on their iPads to create and share new learning artifacts. I had used the same idea at Newmarket School Teacher Only Day earlier in the year and it worked really well.

I thought I would share the share the process and resources here so that others could take that same idea and run with it themselves.

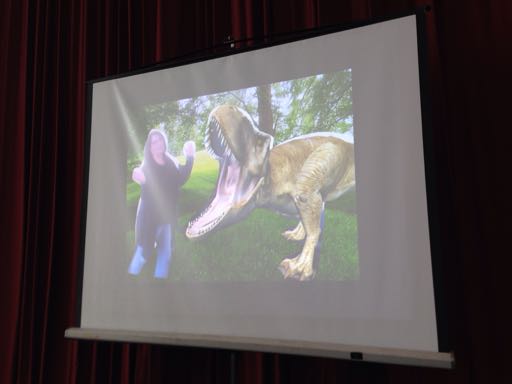
Firstly we chose six apps that were more about the collection of information: the camera, Safari web browser, taking screen grabs, Drawing Pad, AR Dinopark and Pattern Shapes. These apps also could pretty much be used for a variety of purposes, not limited to one curriculum area or level. We also tried to pick apps that had light versions so people would not feel obliged to buy apps before seeing their potential.

Then we chose six great creative apps: Book Creator, Pic Collage, Popplet, Puppet Pals, Show Me and Write About This NZ.

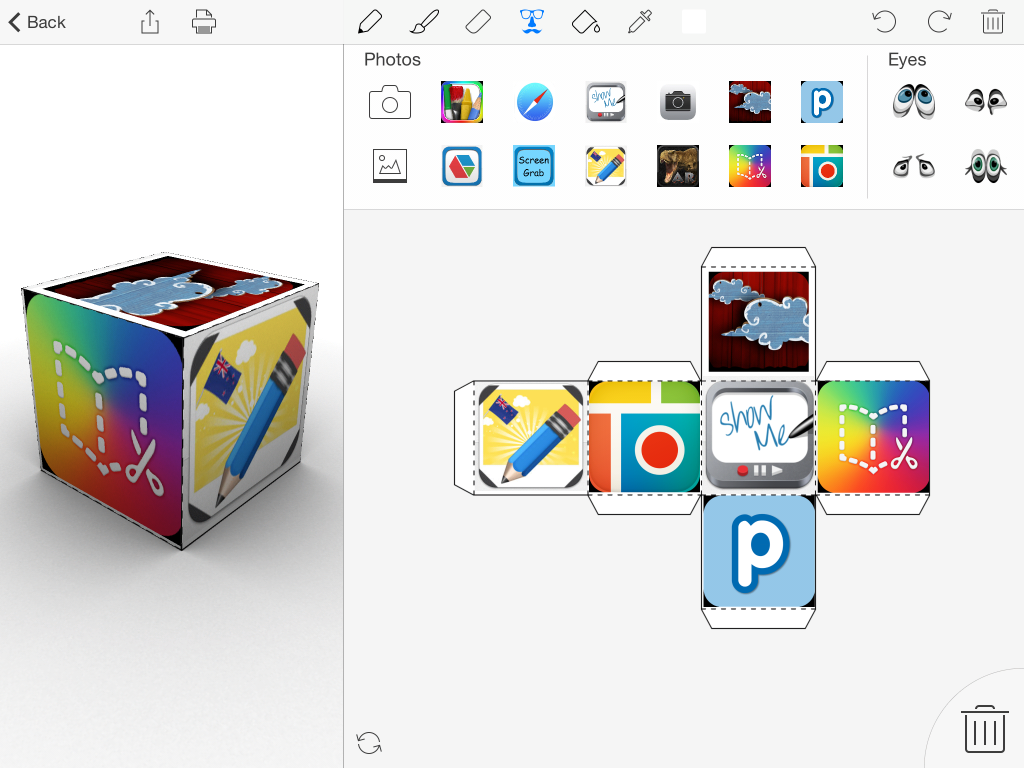
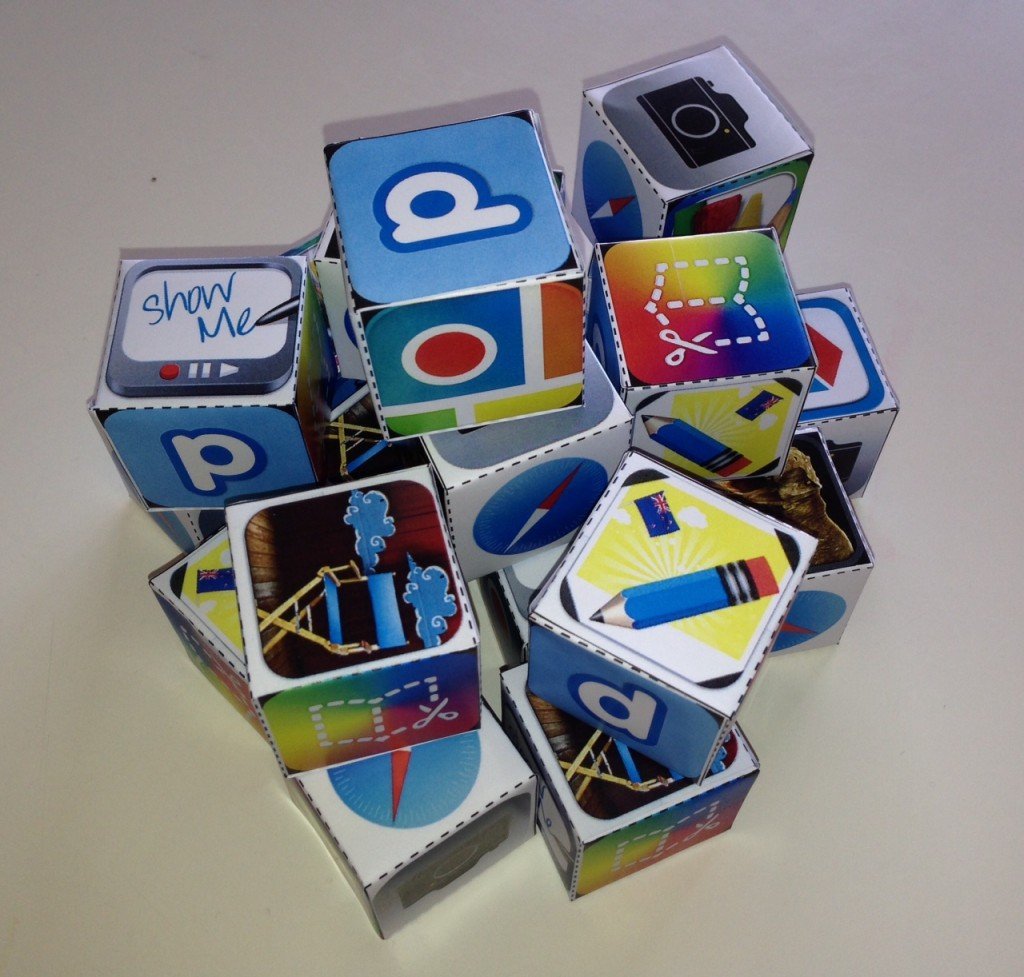
I took screen grabs of all the app icons and used the app Foldify to make a dice with all the apps on them. If you would like to use the nets yourself to replicate the  activity here are the links to PDFs for Dice Set One and Dice Set Two.

Foldify


I photocopied the PDFs from Foldify onto good quality photocopying card. Cutting and gluing the nets took quite some time but it is something you can do while multi-tasking.

All the dice

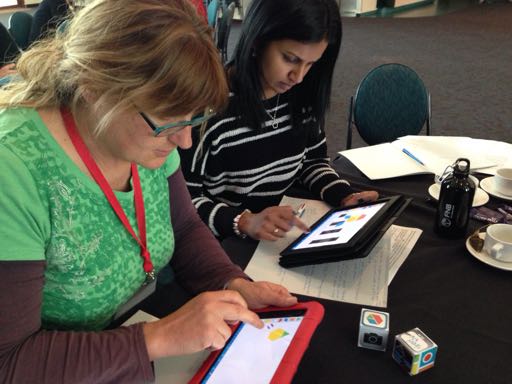
The idea then was that people rolled the two dice. You use what ever two apps roll together to create and share the artifact.

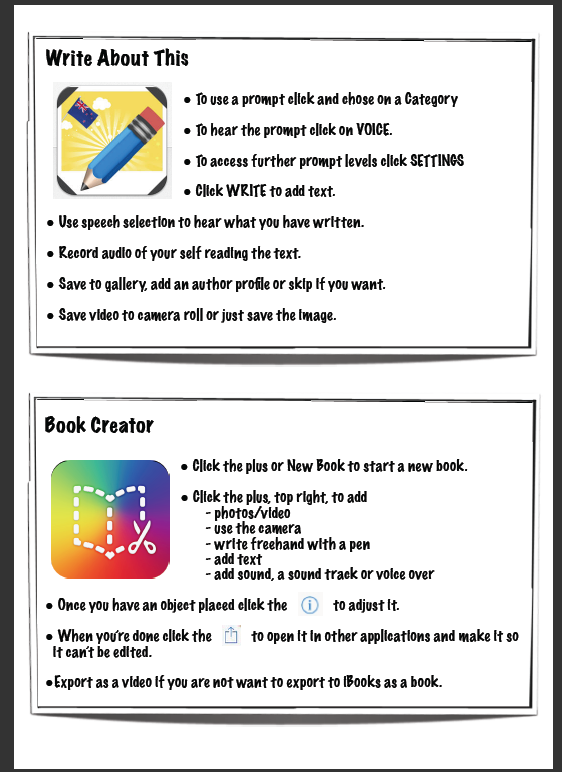
To support and encourage independence and discovery I had made short tutorial cards to support individuals who may not have been familiar with the app design and use. Copies of these are able to be downloaded here.

Screen Shot 2014-10-16 at 11.15.41 pm

Some of the participants chose to work on the activity outside of the table space we were allocated. I think next time I would encourage more people to move outside and use their environment more.

Dice in action

 People came back with some great creations showing their combinations of apps. We attempted to Flick the artifacts to the iPad on the main screen with less success than I would have liked. I think the wifi was a bit pushed by the size of the movies etc being Flicked around.

Dice Combination

When we do this again we would make a third dice that would extend the activity to include curriculum learning areas, so you might have to combine screen grabs with Popplet and create an artifact that supports learning in Mathematics.

Dot Day You Tube Slide Show

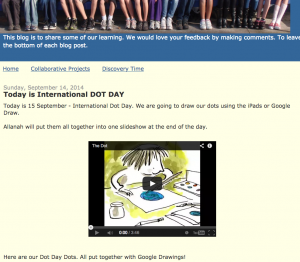
Yesterday was International Dot Day. I love Dot Days. Our last effort was using the iPads. I love the concept of schools all over the world being joined together through sharing children’s art work.

As we were learning how to use Google Drawings better I thought I would have my boys draw their dots in Drawings. I wanted to show them our effort from previous years but to my horror I found out Photopeach is now blocked at school because we have recently moved to using N4L (Network for Learning). I don’t know how to get the fabulous Photopeach Slideshow Maker unblocked so I could use it to show previous dots and share this year’s dots.

And with a bit of help from N4L Photopeach is now unblocked at school. I rang them on 0800LEARNING http://www.n4l.co.nz/contact/ and it was sorted lickety split.

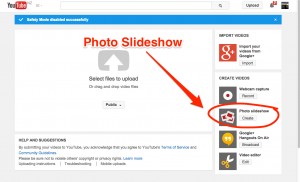
So I had to find another way and You Tube isn’t blocked. You Tube Slideshow Creator! To get there just go to your YouTube Upload Page.

Upload_-_YouTube

Here is a video that shows you how to do it.

You upload your photos en masse, select a sound track and Boom. Job done. Slideshow on blog!

Screen Shot 2014-09-16 at 10.50.18 am

CORE Education Modern Learning Channel Interviews

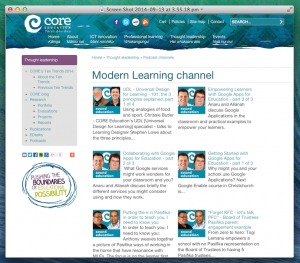
In cased you missed it Anaru White and I were recently recorded chatting about our use of Google Apps for Education in schools.

The series of three short podcasts are now live on the CORE website along with lots of other interesting conversations.

CORE Podcast


If you would like a direct link to the podcasts you can listen on Soundcloud.


Mawhera Taniwha- Google Drawings and Google Slides

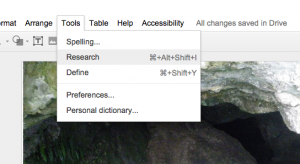
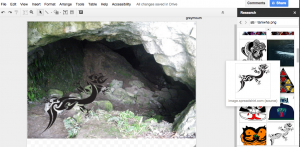
Today we were learning how to make Google Drawings and layering them with transparent png images. We were going to ‘TOOLS- Research- Images- Free to use’ to find our images.

Screen Shot 2014-09-11 at 11.02.31 pm

We used ‘taniwha png’ as the search term so we would get images with transparent backgrounds.

Screen Shot 2014-09-11 at 11.15.58 pm

We found our background image and layered it and went to ARRANGE – send to back, to made sure it was at the back. Then we went and got the taniwha image and put it over top. The Taniwha of the Mawhera caves lives on!

Screen Shot 2014-09-11 at 11.00.48 pm

Then we took it a step further. We made an animation in Google Slides of the taniwha swimming up the river. The original image I used for the taniwha was black and it didn’t show up very well against the dark background so when I got home I imported it to Pixlr Editor (Chrome Web App) and changed the colour to white so it would show up.

Instructions for how to make transparent images and change the colour with Pixlr Editor are linked here.

To make the animation we made our first slide with the Taniwha on it, duplicated the slide and moved the taniwha image slightly, duplicated (Command + D or CTRL +D) and ever so slightly moved the taniwha again, repeating it. Then we just scrolled through the slides really fast and the taniwha swum up the river. Try it it’s lots of fun.

Kids will have a ball!!

You can also take it a step further by embedding the presentation into a blog or Google Site. All you have to do is publish it to the web and change the timings a little…..

Go to FILE- PUBLISH TO WEB and change the size to small and tick the box that says ‘Start slideshow as soon as the player loads’.

Take the embed code and copy it to where you want the presentation to load and change the timing. For where it says 3000 change it to something like 300. And publish.

So this way the animation will play without having to tap away to progress the slides.

Google Educator #alwayslearning

I have been busy lately learning and studying for the Google Educator Exams. The deal is that you have 90 days to sit four compulsory exams: Gmail, Google Calendar, Sites & Drive and a choice of either Chrome or Chromebooks. I chose Chrome.

Last Friday night I felt inspired and took the last exam and got a Google Educator Certificate to add to the portfolio!

Google Educator Logo

As Google is still rolling out the new Google Drive and the exams are more aimed at the old Drive I decided to not to move to the new interface until I had passed them all and got the certificate so I have only been playing around in the new Drive for a week.

I must say I am loving it but you get used to old ways of doing things and some things are in different places and they take a bit of getting used to.

Alice Keeler has been tweeting some good little tutorials that help with the new interface and I have listed some on my Google Site.

I was asked this week how to copy files in to multiple folders in the new Drive and it was a bit tricky to explain with screen grabs so I made a couple of screen recordings to show what Jon Keelty and Monika Kern were trying to tell me to do. Or at least this is what I thought they were trying to share with me!

The Drag and Drop Method!

The Move To Method!

Let’s Write About This

I can’t recall how I first came across the Write About This app but liked it immensely from the very start. The concepts behind this app grabbed me straight away and I could see the potential. How it works is this…

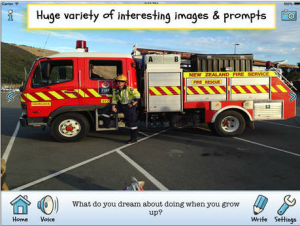
Children select a photo prompt that engages them from a good selection of categories or they could potentially take their own photo.

They are then prompted with a choice of three levels of questions of increasing complexity with an audio overlay in case reading independently is an issue.

They then write their stories and if they want to they can then read their stories aloud and export them as movies for publishing on the web. How motivating for learners!

The only problem with the app as it was when I first saw it was that many of the images were distinctly American- aircraft carriers, men in uniform, yellow school buses, grid iron football- and the voice over was in an American accent. And the spelling- all those favorites and colors!

I got in touch with Brad Wilson, the app developer, and asked about the possibility of making a kiwi version. He was keen so I enlisted the assistance of the Learning with Digital Technologies team for support. Monika Kern took me up on the offer and together we worked on identifying images that we needed to change and sourcing new ones with a distinctive kiwi flavour.

We did try to record the audio prompts ourselves but it was taking too long and we were unsure of the consistency so Brad organised a Kiwi voice over artist. And here we are now with the app being launched in the iTunes store. How awesome is that.

Screen Shot 2014-08-30 at 9.58.26 am

I am chuffed that they used a photo I took on the way home from working in Blenheim earlier this year as a cover photo. The youngest member of the fire brigade team proudly stood by the truck to have his photo taken while the rest of the team were giving him cheek.

Here is a quick recording I made to show you a finished story. I would love to see what you and your students come up with.

You can also purchase Tell About This from the same team which focusses more on oral retelling.

Here is one we made with the Kiwi version of the app…..