Google Education Trainer

UPDATE: This process has changed with a name change and change of emphasis.

Here is some more info on the changes

In December 2014 I qualified to be a Google Education Trainer. This step is the latest on my journey to know more about Google products and how to support students and teachers in their use to support learning.

GoogleEducationTrainer_badge_RGB

There are essentially three kinds of Google certification that I have achieved, each quite different and I don’t think of them in any particular hierarchy- they are just different.

A Google Certified Teacher– To become GCT you apply and prepare an application video and written application to go to a Google Teacher Academy. Google select between five and ten New Zealand applicants for each Google Teacher Academy which accepts about 50 educators in each intake. Until this year were biennial so I hope they have moved to having one a year from now on. I applied to go to Sydney because it was closest, and therefore cheaper, for us here in NZ but you can apply to go to any GTA around the world. In 2013, when I became GCT, we had a guy from Alaska who was at the Academy! You have to pay your own way- flights and accommodation. It helps to get picked if you are active in leading the educational community- Twitter, Google Plus, that sort of thing- indeed questions about the number of followers you have is part of the application process. Many apply and few are chosen!

Google Educator – To become a Google Educator you take four compulsory exams (Gmail, Docs, Calendar and Sites) and one elective exam (Chrome, Chromebooks or Android devices).
You have to get over 80% on each exam to pass but if you fail one of the tests you have to wait for a time, seven days I think, to sit it again, pay the money again and have another go. You have to complete all five tests within a 90 day period. The content in the tests is easy sometimes and hard sometimes, depending on what you know. In total it would cost you about $100NZ.

When you have completed the exam it is automagically marked and you know instantly if you have passed or not. It annoyed me though that you don’t find out which questions you got wrong so you could potentially be giving people wrong advice when they ask the same questions as were asked in the exams because you only thought you got the answers right.

You could learn as much by reviewing the learning modules and not actually sitting the exams but it does give purpose and a feeling of accomplishment if you know there is going to be an exam at the end.

Google Education Trainer– To gain the Google Education Trainer certification you have to have previously achieved Google Educator status and submit a record of Google PD sessions you have delivered, references to say you did a good job of them and make a training video outlining an aspect of Google goodness. You also submit an in depth case study of a Google PLD session you have delivered. In my case I chose to submit my case study around using Google Classroom. If accepted you are then added to the database of global Education Trainers and you get to put the Google Trainer Badge on your blog or website. You also get access to a global support group of other GCT or GET to learn and share your resources- that is where the you find the gold- learning from and with other passionate educators.

You can find out more through this site https://www.google.com/edu/training/get-certified/

Writing Books for iTunes

We have had some successes with writing books using Book Creator and publishing them to iTunes.

I thought I would outline the process here because it really is simpler than you might think.

Here is our workflow for this particular lesson.

It was Guy Fawkes and children had stories to tell of their fireworks experiences that we wanted to record and share.

Firstly we had a play with the Real Fireworks App that I had bought but I see that there is a free version as well. The app very cleverly lets you take a screengrab of the fireworks in action as you create fire bursts. These were saved into the camera roll and Flicked to me or using Photo Transfer to move whole sets of photos to the one iPad in one go.

To collect the children’s writing in one place for this lesson I decided to use Google Forms. I had found a cool video of a drone flying through exploding fireworks so threw that in the form as well to keep things lively.

Here is a link to the actual form. Of course the children needed to have access to the form so I embedded and linked it into a blog post in the Moturoa Blog. The blog is bookmarked on all the devices they children have at their devices and added to the home screen of the iPads so everyone knows where to access everything we might need.

http://moturoa.blogspot.co.nz/2014/11/fireworks.html

The children were able to view the video independently and write their text in the form.

That night I had a bit of a play with copying the text from the form that I accessed via Google Drive/Google Sheets app on the iPad and pasted it onto the screengrabs that I had quickly out in Book Creator.

I matched the colours of the text with the colours of the Fireworks so it would all look lovely.

Next day I had the children record their narration of the text. To improve the quality of the recording I used my iRig Mike and my mike on the Apple ear buds, which worked quite well.

I wanted to have a little video in the book as a practice so used X-Mirage to reflect my iPad onto the Mac and record the fireworks using Quicktime. The video was small enough to email to my iPad but I could have uploaded it to Google Drive if I needed to to get it onto my iPad for inserting into the Book Creator. Boom! We were nearly ready to upload to iTunes.

I needed to do a couple more things before sending it off to iTunes. I needed to make sure the video was in mp4 format. To change it in Book Creator just select it and click on the ‘i’ and change the format!!

I also took a couple of screen grabs and made a copy of the book and took some pages out to act as a book sample for those who didn’t want to download the whole book.

I uploaded the whole project to Google Drive as it was too big to email to my laptop. Google Drive gave me a shareable link to the multi-touch book that I could then share with people directly via an email link or blog post to give them a copy of the book without sending it to iTunes.

STEP ONE: Create an iTunes Connect Account

I had already made a iTunes Connect Account to publish the Bling For Your Blog book so that part was simple. Book Creator has made a handy ‘how to’ on how to get started with an iTunes Connect Account. Here is the link to it. I think the process would be a lot more complicated if you wanted to sell your books but I decided that they were all going to be free!!!

STEP TWO: Install iTunes Producer

iTunes Producer is the software template that allows you to upload your books, previews and blurb. You connect the iTunes Connect Account with iTunes Producer. Book Creator again shares how to do this part.

STEP THREE: Upload Your Book

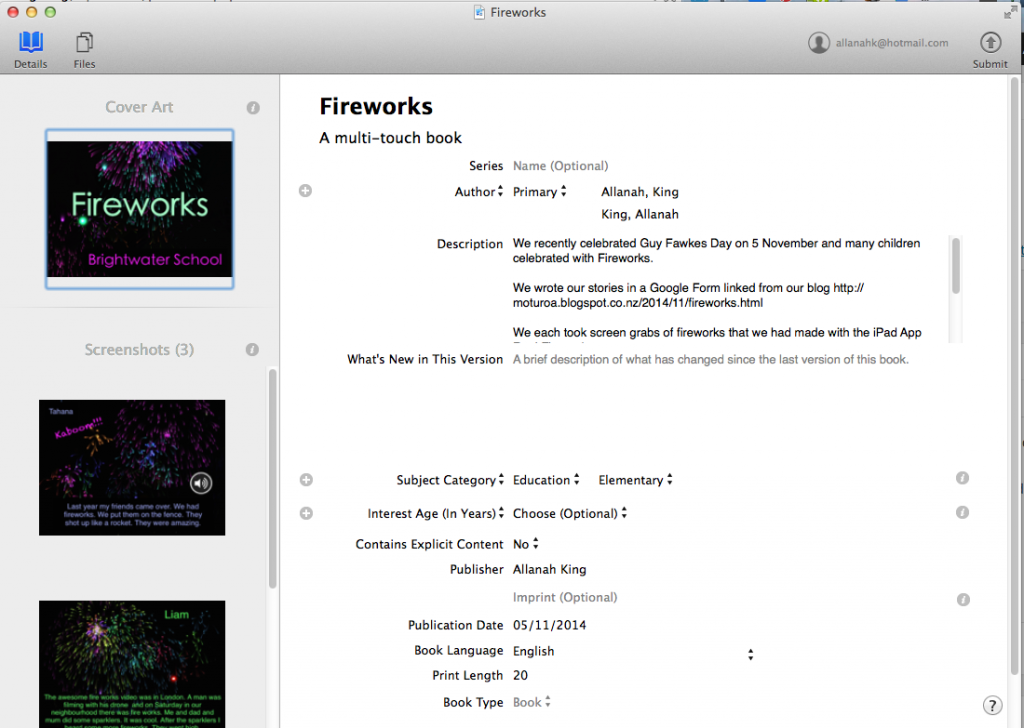
This is the easy part. You fill out all the information about the book for upload and if you get it wrong you will get error messages. This was the first time I had uploaded page previews and they had to be a specific size. I chose 748 x 1024 for the preview pages and 1023 x 1400 for the title page. Here are Book Creator’s notes on what to do for this part.

Screen Shot 2014-11-19 at 10.55.14 pm

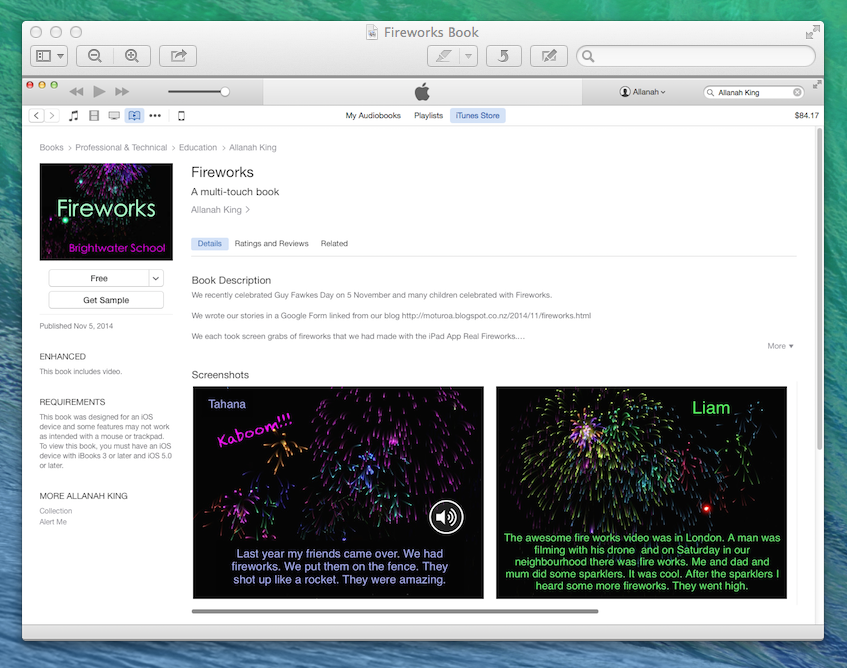
iTunes then takes a look at your book and makes sure it is suitable to be in the iBooks Store and a day or so later your book is available for the world to download.

Do take a look- We think it’s rather cool.

https://itunes.apple.com/nz/book/fireworks/id942796591?mt=11

Fireworks

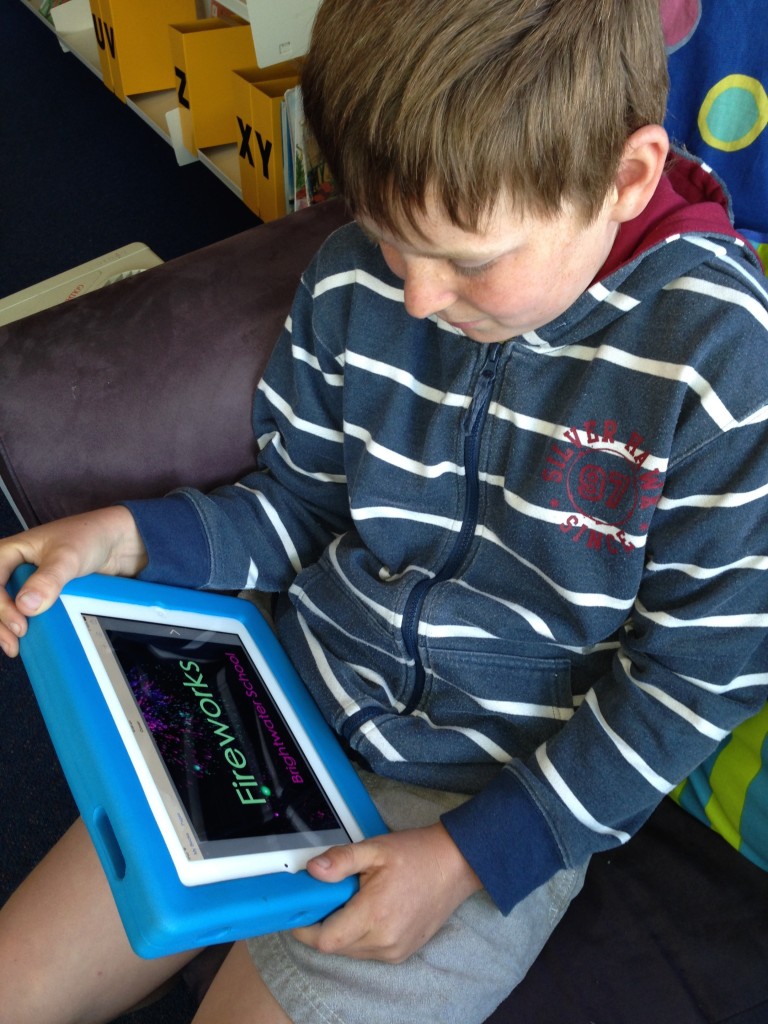
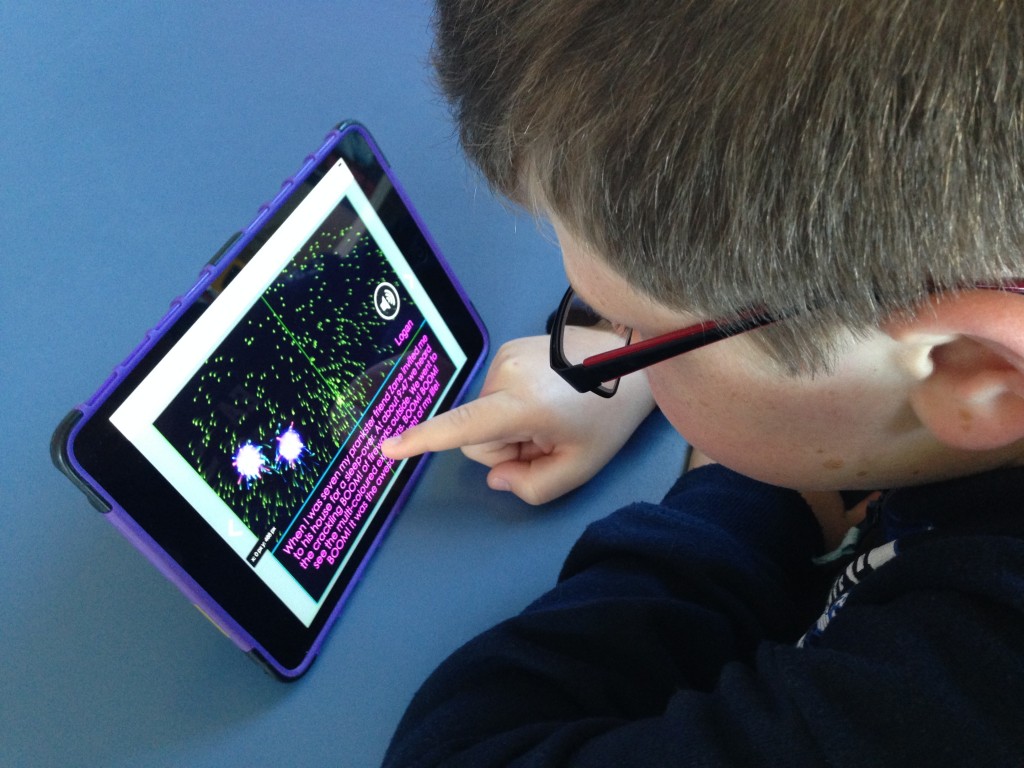
If you didn’t want to go that extra step of publishing your book to iTunes you could easily export it to you Google Drive or Dropbox and get a shareable link from there. Here is the link to the direct download of the Fireworks book from my Google Drive.

IMG_6925

IMG_6920

And if you don’t like to have the book upload to iTunes or as a download From Google Drive you could always export it as a movie and upload it to You Tube as I did here.

Easy Accents – Macrons- Google Doc Add On

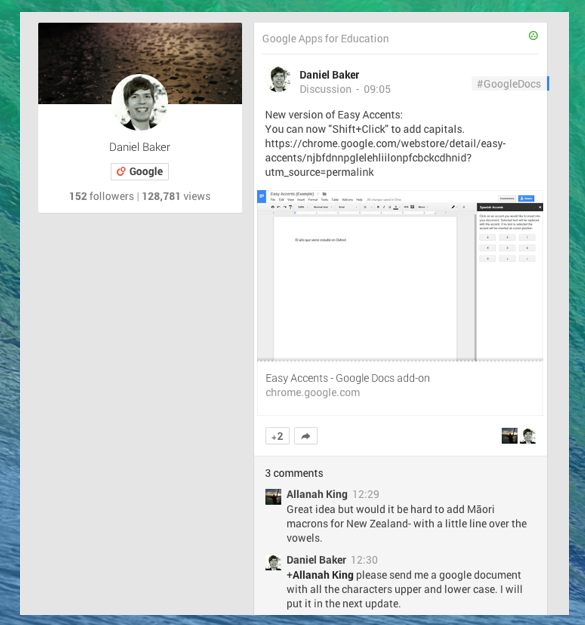
A couple of days ago Chris Harte, who was in my group at the Google Academy last year, posted on Google Plus about an Add On to Google Docs ‘Easy Accents‘ that allowed writers to easily use accents when writing.

As I often do I emailed myself the link so I could look at it more when I had a moment.

This afternoon I had a moment.

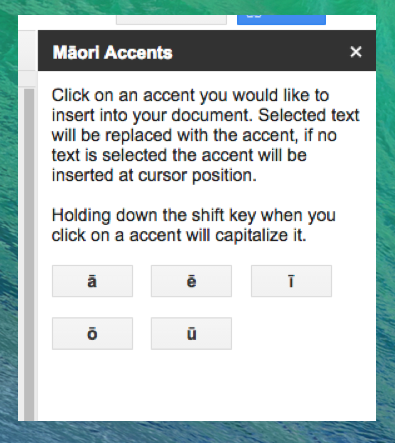
Dan Baker had originally posted that he had updated the app but sadly the accents didn’t include Māori macrons, only French, German and Spanish. I took it upon myself to ask Daniel if there was a possibility of adding Māori. Dan lives in Missouri and the time zones must be compatible with a Sunday afternoon in New Zealand so there followed a quick flurry of emails and a shared Google doc and within the hour the job was done and being pushed out to Google servers globally.

Screen Shot 2014-11-02 at 5.45.10 pm

So now go to a Google Doc- ADD ONS- get add ons and look for ‘Easy Accents’ or click here directly to add it to Chrome.

Screen Shot 2014-11-02 at 5.48.01 pm

I have not been able to contribute much to Connected Educator Month because of other work commitments but I think that this is what being connected is all about.

I am so impressed with Daniel’s responsiveness I donated to help him along and encourage young developers like him.

Dot Day You Tube Slide Show

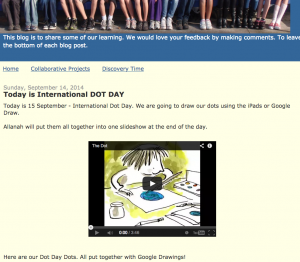
Yesterday was International Dot Day. I love Dot Days. Our last effort was using the iPads. I love the concept of schools all over the world being joined together through sharing children’s art work.

As we were learning how to use Google Drawings better I thought I would have my boys draw their dots in Drawings. I wanted to show them our effort from previous years but to my horror I found out Photopeach is now blocked at school because we have recently moved to using N4L (Network for Learning). I don’t know how to get the fabulous Photopeach Slideshow Maker unblocked so I could use it to show previous dots and share this year’s dots.

And with a bit of help from N4L Photopeach is now unblocked at school. I rang them on 0800LEARNING http://www.n4l.co.nz/contact/ and it was sorted lickety split.

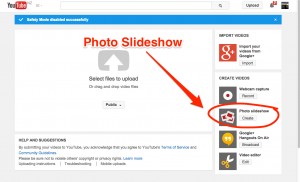
So I had to find another way and You Tube isn’t blocked. You Tube Slideshow Creator! To get there just go to your YouTube Upload Page.

Upload_-_YouTube

Here is a video that shows you how to do it.

You upload your photos en masse, select a sound track and Boom. Job done. Slideshow on blog!

Screen Shot 2014-09-16 at 10.50.18 am

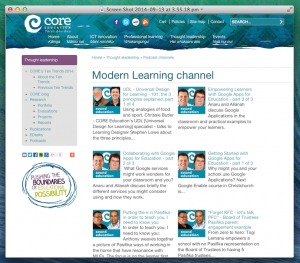
CORE Education Modern Learning Channel Interviews

In cased you missed it Anaru White and I were recently recorded chatting about our use of Google Apps for Education in schools.

The series of three short podcasts are now live on the CORE website along with lots of other interesting conversations.

CORE Podcast


If you would like a direct link to the podcasts you can listen on Soundcloud.


Mawhera Taniwha- Google Drawings and Google Slides

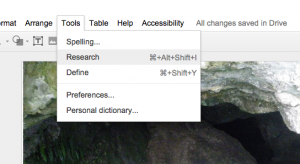
Today we were learning how to make Google Drawings and layering them with transparent png images. We were going to ‘TOOLS- Research- Images- Free to use’ to find our images.

Screen Shot 2014-09-11 at 11.02.31 pm

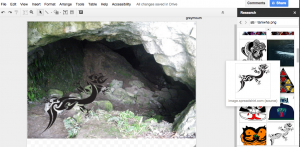
We used ‘taniwha png’ as the search term so we would get images with transparent backgrounds.

Screen Shot 2014-09-11 at 11.15.58 pm

We found our background image and layered it and went to ARRANGE – send to back, to made sure it was at the back. Then we went and got the taniwha image and put it over top. The Taniwha of the Mawhera caves lives on!

Screen Shot 2014-09-11 at 11.00.48 pm

Then we took it a step further. We made an animation in Google Slides of the taniwha swimming up the river. The original image I used for the taniwha was black and it didn’t show up very well against the dark background so when I got home I imported it to Pixlr Editor (Chrome Web App) and changed the colour to white so it would show up.

Instructions for how to make transparent images and change the colour with Pixlr Editor are linked here.

To make the animation we made our first slide with the Taniwha on it, duplicated the slide and moved the taniwha image slightly, duplicated (Command + D or CTRL +D) and ever so slightly moved the taniwha again, repeating it. Then we just scrolled through the slides really fast and the taniwha swum up the river. Try it it’s lots of fun.

Kids will have a ball!!

You can also take it a step further by embedding the presentation into a blog or Google Site. All you have to do is publish it to the web and change the timings a little…..

Go to FILE- PUBLISH TO WEB and change the size to small and tick the box that says ‘Start slideshow as soon as the player loads’.

Take the embed code and copy it to where you want the presentation to load and change the timing. For where it says 3000 change it to something like 300. And publish.

So this way the animation will play without having to tap away to progress the slides.

Google Educator #alwayslearning

I have been busy lately learning and studying for the Google Educator Exams. The deal is that you have 90 days to sit four compulsory exams: Gmail, Google Calendar, Sites & Drive and a choice of either Chrome or Chromebooks. I chose Chrome.

Last Friday night I felt inspired and took the last exam and got a Google Educator Certificate to add to the portfolio!

Google Educator Logo

As Google is still rolling out the new Google Drive and the exams are more aimed at the old Drive I decided to not to move to the new interface until I had passed them all and got the certificate so I have only been playing around in the new Drive for a week.

I must say I am loving it but you get used to old ways of doing things and some things are in different places and they take a bit of getting used to.

Alice Keeler has been tweeting some good little tutorials that help with the new interface and I have listed some on my Google Site.

I was asked this week how to copy files in to multiple folders in the new Drive and it was a bit tricky to explain with screen grabs so I made a couple of screen recordings to show what Jon Keelty and Monika Kern were trying to tell me to do. Or at least this is what I thought they were trying to share with me!

The Drag and Drop Method!

The Move To Method!

Collaborative Device Resources

Over recent weeks I have been nurturing and curating a couple of Google Presentations that put together some tips and tricks for using a variety of BYOD devices.

Here they are below. Hope they are useful and please add your own resources to them.

Click here to edit the Chromebook Tips and Tricks Presentation.

Click here to edit Microsoft Surface Tablet Tips and Tricks Presentation


Chromebook Update Review

I bought myself a Samsung Chromebook for $450 inc GST in October because that’s what early adopters tend to do and I like trying and learning new things.

I wrote a Chromebook review on a borrowed device last year and I can thankfully say that the device is much improved- a different kettle of fish entirely from what I used last year.PicCollage

Here are some of my thoughts around using Chromebooks and Google Apps- appreciating the fact that I am Google Certified Teacher as well as a Blended eLearning Facilitator. My perspective on teaching and learning is flavoured by teaching mainly from year four to six so I can’t discuss how they might look in a secondary school situation.

  •  I think that they are a good, cheap device for doing the sorts of things that senior students often want to do- writing, collaborating, researching, connecting, recording, learning!  You have to have a Google account or create one on startup and some internet to get the device working.
  • It is really easy to use as a shared device as you log in to your Google Account you get all your services at your fingertips- just log out and pass on to the next person if needed.
  • The battery seems to last a good while and I love the ‘instant on’ feature- you lift the lid and the thing is on.
  • I like the decent sized keyboard that my fingers know where they are supposed to go unlike silly little netbooks where I was forever typing the wrong letters- it was driving my crazy!
  • It is lightweight so easy to carry around, backwards and forwards to school if needed as a personal device.
  • I really like that anything you do on it is never lost- with things going to Drive which autosaves you can never lose your work.
  • I think it is robust enough to take the knocks but I look after mine cos I paid for it with my own money- not sure how it would handle the rigours of being bashed around all the time- only time and a trial could tell that I suppose.  
  • I also like that there are never any updates to do or viruses to check for- all that sort of thing is done for you by launching Chrome which automatically checks for updates as it starts up.
  • Yes they are good at searching the web but so much more than that- with the use of Google Docs and potentially Hapara Teacher Dashboard to manage the use of docs, blogs, curriculum areas etc for teachers it can be a really powerful tool.
  • You can easily add other apps and extensions to Chrome to enhance and empower your experience. You get the basic tools like docs, presentations, spreadsheets, forms and drawings as standard but can add other powerful apps like We.video and Video.notes which can add even more functionality to the experience and if you add Chrome extensions as well you can do some quite amazing things.
  • I splashed out and bought a Chromecast as well. A Chromecast is a bit like an Apple TV in that you can wirelessly mirror your browser onto a data display. I had to order it through Amazon and YouPost and cost my $87NZ delivered to NZ. Here is a video that shows you how to set it up. I like that as well because as you mirror one tab you can do something else on a different tab! At the end of the year you could show your class a YouTube video in one tab and be writing your reports in another!!!!!
  • On first starting up the Chromebook I had to quickly learn to do some things in new ways…..

It is a different way of thinking though and it took me a bit of fiddling to do some of the things I do without thinking on my Mac Book Pro.  

My first hurdle was to remember my really strong Google password. I use OnePassword to store my passwords and it is a download on my Mac so I had to copy it from my iPhone app when I first opened up my Chromebook. After a quick tweet to OnePassward I was able to access the rest of my passwords because I have them synching in Dropbox

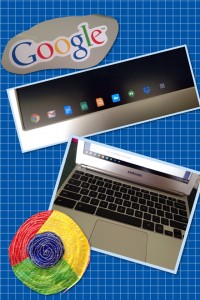
Talking of Dropbox you can’t of course have off line access but I was able to add the app and have it sitting on my bottom toolbar like in the photo collage above.

To take a screen grab I had to add an extension and then I had to figure out where the screengrab actually went when it was captured. I Googled it and found there actually was a FILES folder for things that you want to save for things like PDFs so I have that sitting on the bottom tool bar as well.

I couldn’t use Skype because that is a download so can use Google Hangouts instead. You just think to yourself how can I do this a different way!

My Chromebook is stand alone as it my own personal one but as a teacher I would want the management console so I could push out settings, websites and those sorts of things to the students but I am not sure that you would need to in a secondary setting- you would have to ask other Chromebook users for their opinions on that.

In saying all that I have only really used my Chromebook where I know there is good strong wifi or tethered it to my iPhone. I think that without that connectivity then it would be nothing more than a rather lightweight, funky looking brick!

There is a lot for me to learn yet as I explore and play but I’m underway.

* * * * * * * * * * * * * * * * * * * * * * * * * * * * * * * * * * * * * * * * * * * * * * * * * * * * * * * * * * * * * * * * * *

  • Here are my Google resources that you may like to have a look where I remember and share all things Google.

https://sites.google.com/site/ggwg2011/home

As an on-going keeping abreast of what is happening with Chromebooks you may like to join the Chromebook group on the VLN to ask questions and learn through other’s experiences.

http://www.vln.school.nz/groups/profile/826377/chromebookchrome-user-group

And here are my Chromebook on line bookmarks that I have saved as a resource.

https://www.diigo.com/user/allanahk/Chromebook

I store my bookmarks in Diigo which is an on line social bookmarks curating website. If you find the site not working at school it is probably because your filters are blocking it because it is social and you may have to look at my bookmarks at home!!!

I would be interesting to hear how you are getting on with your Chromebooks.

What advice can you share about how you are using them.

What questions do you want to ask?

What’s the Weather?

I have noticed that many junior classes have a daily ritual of recording the day, date, weather and forecast.

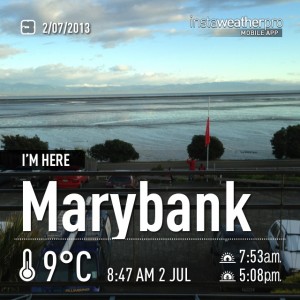
Thinking of the SAMR model and how we can redefiine this task I noticed Ginger Lewman had been recording where she travels by using the iPad app Instaweather Pro. I see it is also available for Android on Google Play.

903121958-rounded

I was thinking how each day a couple of children could go outside and use the app to record a daily weather photo. The app knows where it was taken, records the temperature, says the time, day and date, sunrise and sunset. All good information for data gathering over time.

Instaphoto

The image could then be shared on the class blog with children recording in their own voice how the weather is and what their aspirations are for the day!

Thinking of what level this would be in the SAMR model I would probably go for Modification- the use of technology allows us to do more – significantly redesigning the learning task.

What do you think? How could I take it up one notch more??